Heltec ESP32 Series Quick Start
This article describes the installation of the Heltec ESP32 series development framework and library.
Summary
Heltec’s Arduino-based ESP32 development environment consists of two parts:
Heltec ESP32 Development Framework: Fully adapted from the official Espressif library, it includes board definitions, core functionalities, and examples for the ESP32 (such as Wi-Fi, Bluetooth, and external drivers etc.).
Heltec Extended Example Library: This library depends on the aforementioned ESP32 Development Framework**. It includes examples for LoRa/LoRaWAN, display demonstrations, GPS, sensors, and factory test programs for Heltec products etc..
Warning
Framework v3.0.0 and Library v2.0.0 are updated together, Older frameworks and libraries are no longer applicable to the new ones.
Tip
You can also use the official Espressif Arduino framework as a replacement for the Heltec ESP32 Development Framework. Just ensure that the corresponding version is compatible.
Preparation
Hardware
High quality USB_Type_C cable
Tip
Some cables only charge and do not transfer data, so you need to avoid this when uploading code.
Software
USB driver: CP210x Driver.
Installing development framework and library
There are three methods to install the development framework, choose one of they:
Via Arduino IDE
Open Arduino IDE, and click
File->Peferences.

Input the last ESP32 package URL: https://resource.heltec.cn/download/package_heltec_esp32_index.json

Click on the
Boards Managericon on the left side, and enter “heltec esp32” in the search box that pops up, then select the latest version and clickINSTALL.

Install Heltec Esp32 Extended library
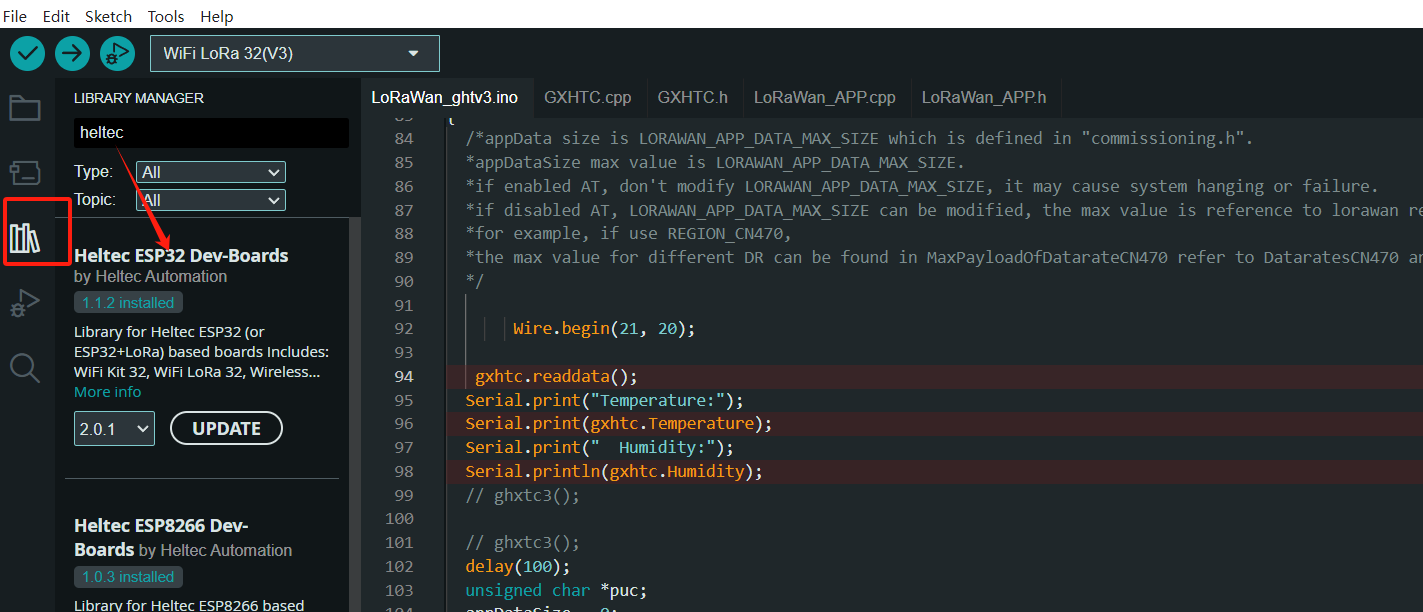
Click on theLibrary Managericon on the left side, search for “HELTEC ESP32”, select the latest version and install
Via Git
Note
It is recommended to follow the path and file name as described below as much as possible to avoid unnecessary trouble.
Install Heltec ESP32 Development Framework
Check the following links for your operating system, the specific operation steps are detailed in the link:
For Linux
Warning
After installation, please execute “get.exe” under the path of “Arduino\hardware\heltec\esp32\tools” to obtain the latest compilation tool.
Install Heltec Extended Example Library
The above is the framework installation. If you need to install the Heltec ESP32 extended library, you can refer to this link:
-
Follow the instructions in the
Readme.MDto install.
Via Local File
Note
It is recommended to follow the path and file name as described below as much as possible to avoid unnecessary trouble.
Download the development environment. Download Framework
Open Arduino IDE, and click
File->Peferences.
Go to the folder in the red box.

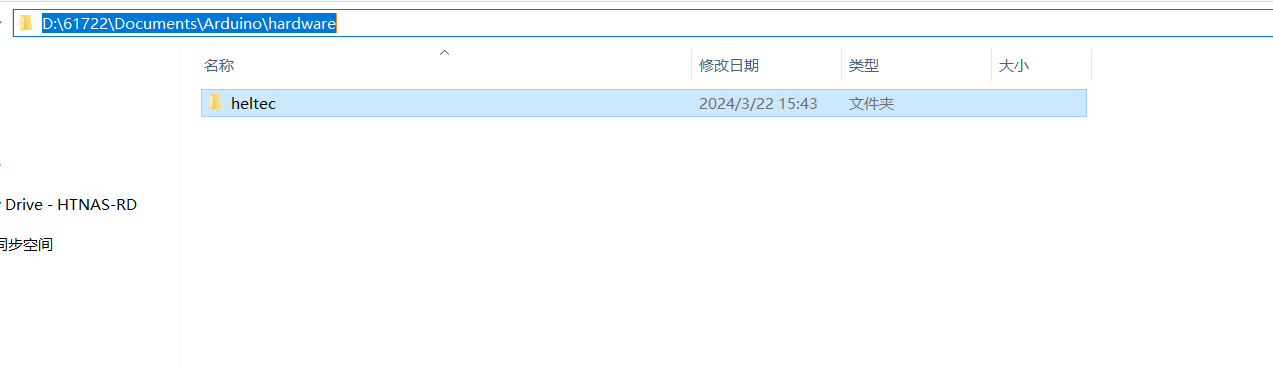
Create a new “hardware” folder in the Arduino folder. If there is already a “hardware” folder, you don’t need to create a new one.

Creat a new “heltec” folder in “hardware” folder.
Go to the “heltec” folder and extract “esp32” into this folder.
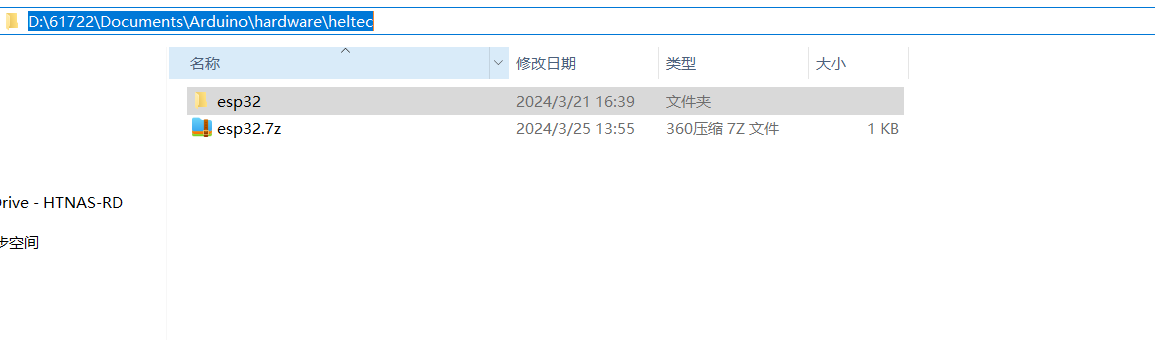
Go to the “heltec” folder, refer to the figure below to confirm whether the path in the red box is correct.

Restart the Arduino IDE to confirm whether the development environment is installed successfully.

For special code library, search for “HELTEC ESP32” in
Library Manager, select the latest version and install:ESP32 Series Library
Programming
Once you have the framework and libraries installed, connect your computer to the board and start programming nodes.
Example
Connect your node to the computer with a USB cable.
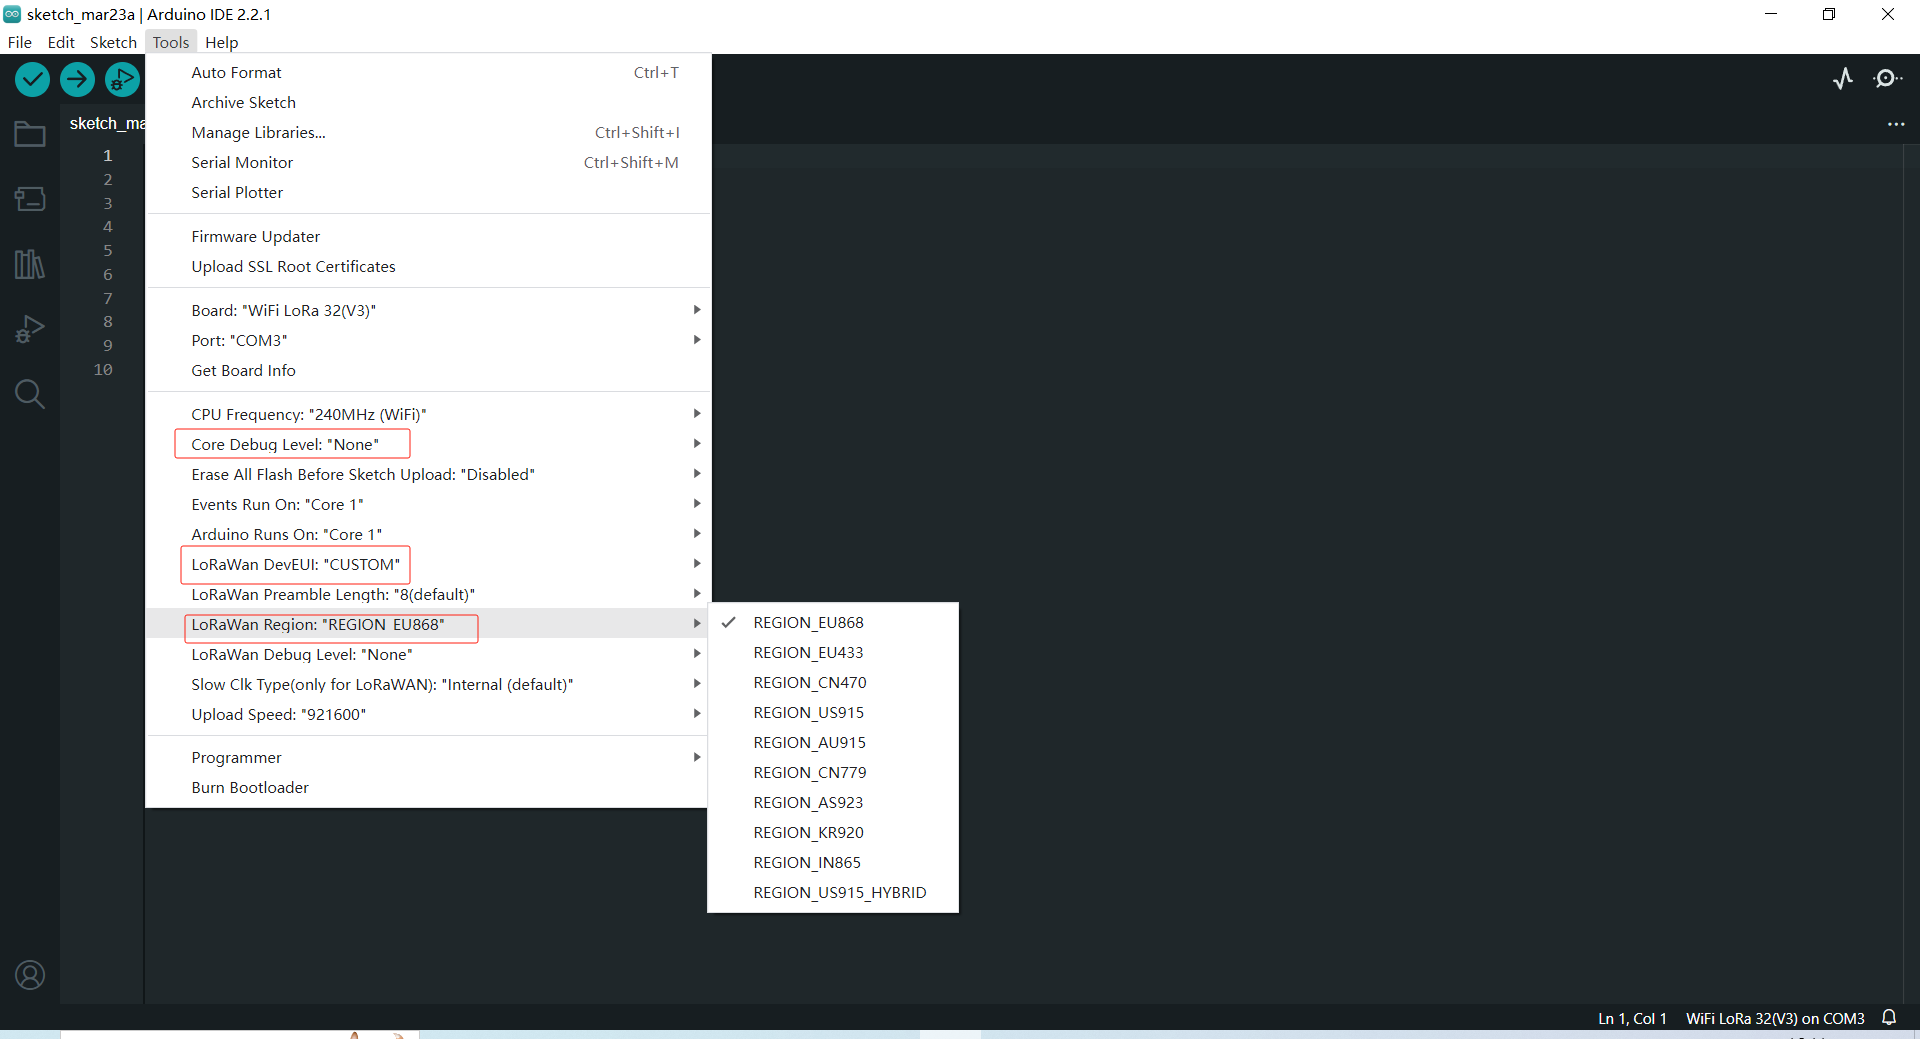
Open Arduino IDE, Correctly select a board and relevant options in the
Toolsmenu:

Then select an example.
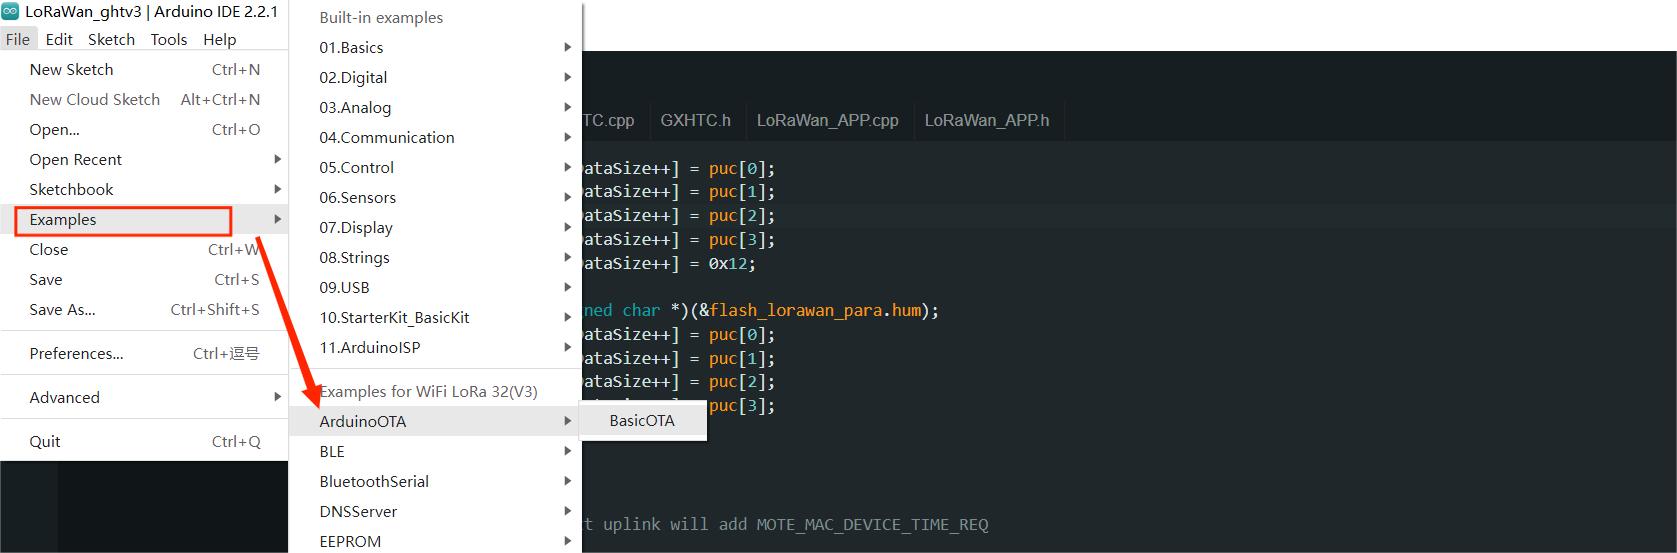
To execute the code in a library, you need to mouse over, scroll down, find the library, and find the code in it.

Compile & Upload

Tip
If you cannot upload the code, please manually enter the BOOTLOADER mode: hold down the PRG (USER/BOOT) key and do not release it, press the RST key once, and then release the PRG (USER/BOOT).
Programming
Connect your node to the computer with a USB cable.
Open Arduino IDE, Correctly select a board and relevant options in the
Toolsmenu:
Programming
New sketch

To execute the demo in the heltec ESP32 library, you need to mouse over, scroll down, find the library, and find the code in it.
Compile & Upload
Tip
If you cannot upload the code, please manually enter the BOOTLOADER mode: hold down the PRG (USER/BOOT) key and do not release it, press the RST key once, and then release the PRG (USER/BOOT).