How to Refresh E-ink
Summary
This topic aims to describe refreshing the E-ink with Arduino and the code provided by us.
Image coding
Tip
Some screen does not support grayscale, so when making the image, you will need to convert it to a pure black and white image, the image resolution cannot be larger than the screen resolution.
Using code refresh E-ink, you’ll need a tool for image transcoding, in this case Convertio.
Open Convertio: https://convertio.co/zh/xbm-converter/, and select the image that needs to be taken,
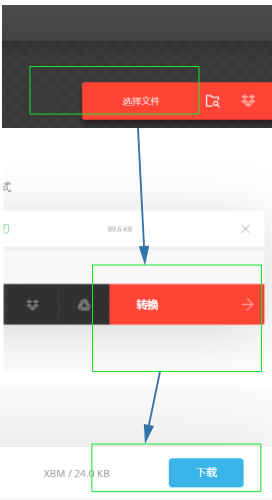
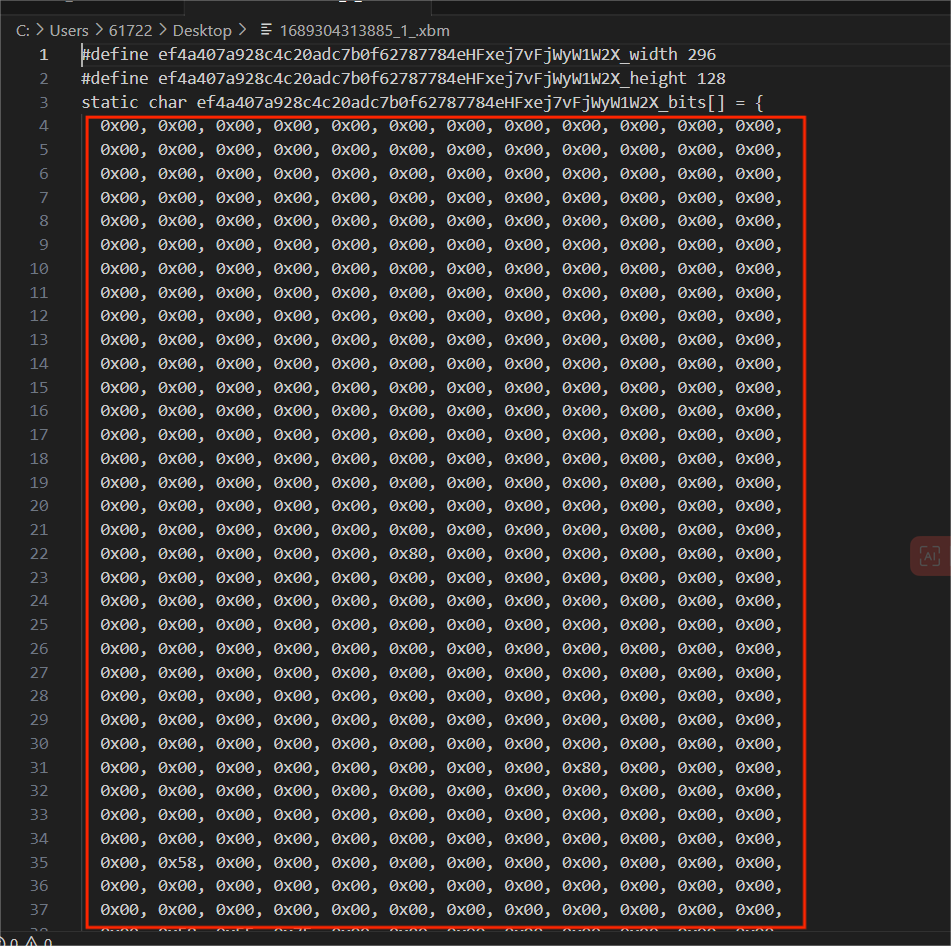
Copy and save the code in the red box you get as shown below.
Connect the development board with E-ink
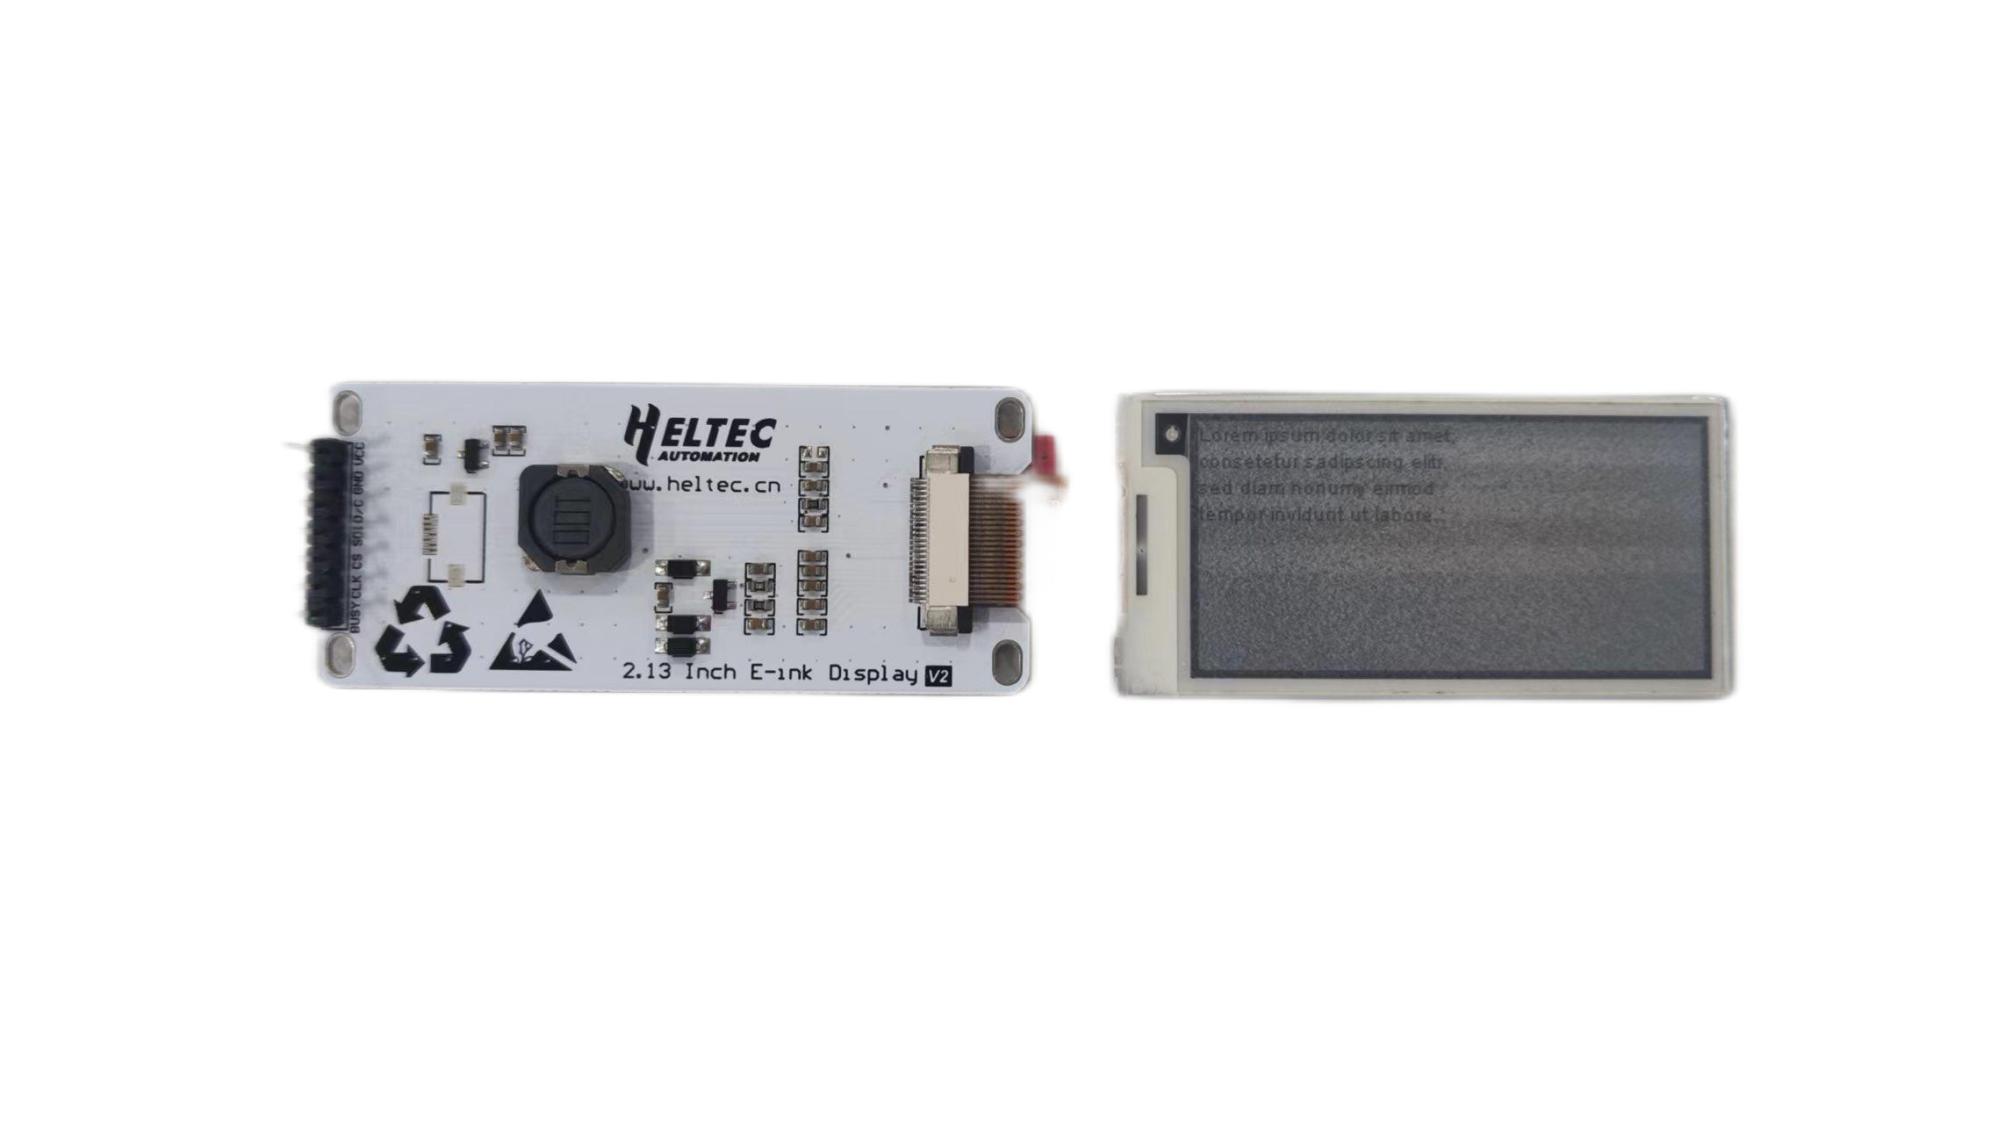
Here, take WiFi LoRa 32 V3 and 2.13 inch black and white red E-ink as an example.
Connect the driver board with E-ink
The development board with E-ink needs to pass through the driver board. Heltec has a number of Einks already integrated with driver boards.
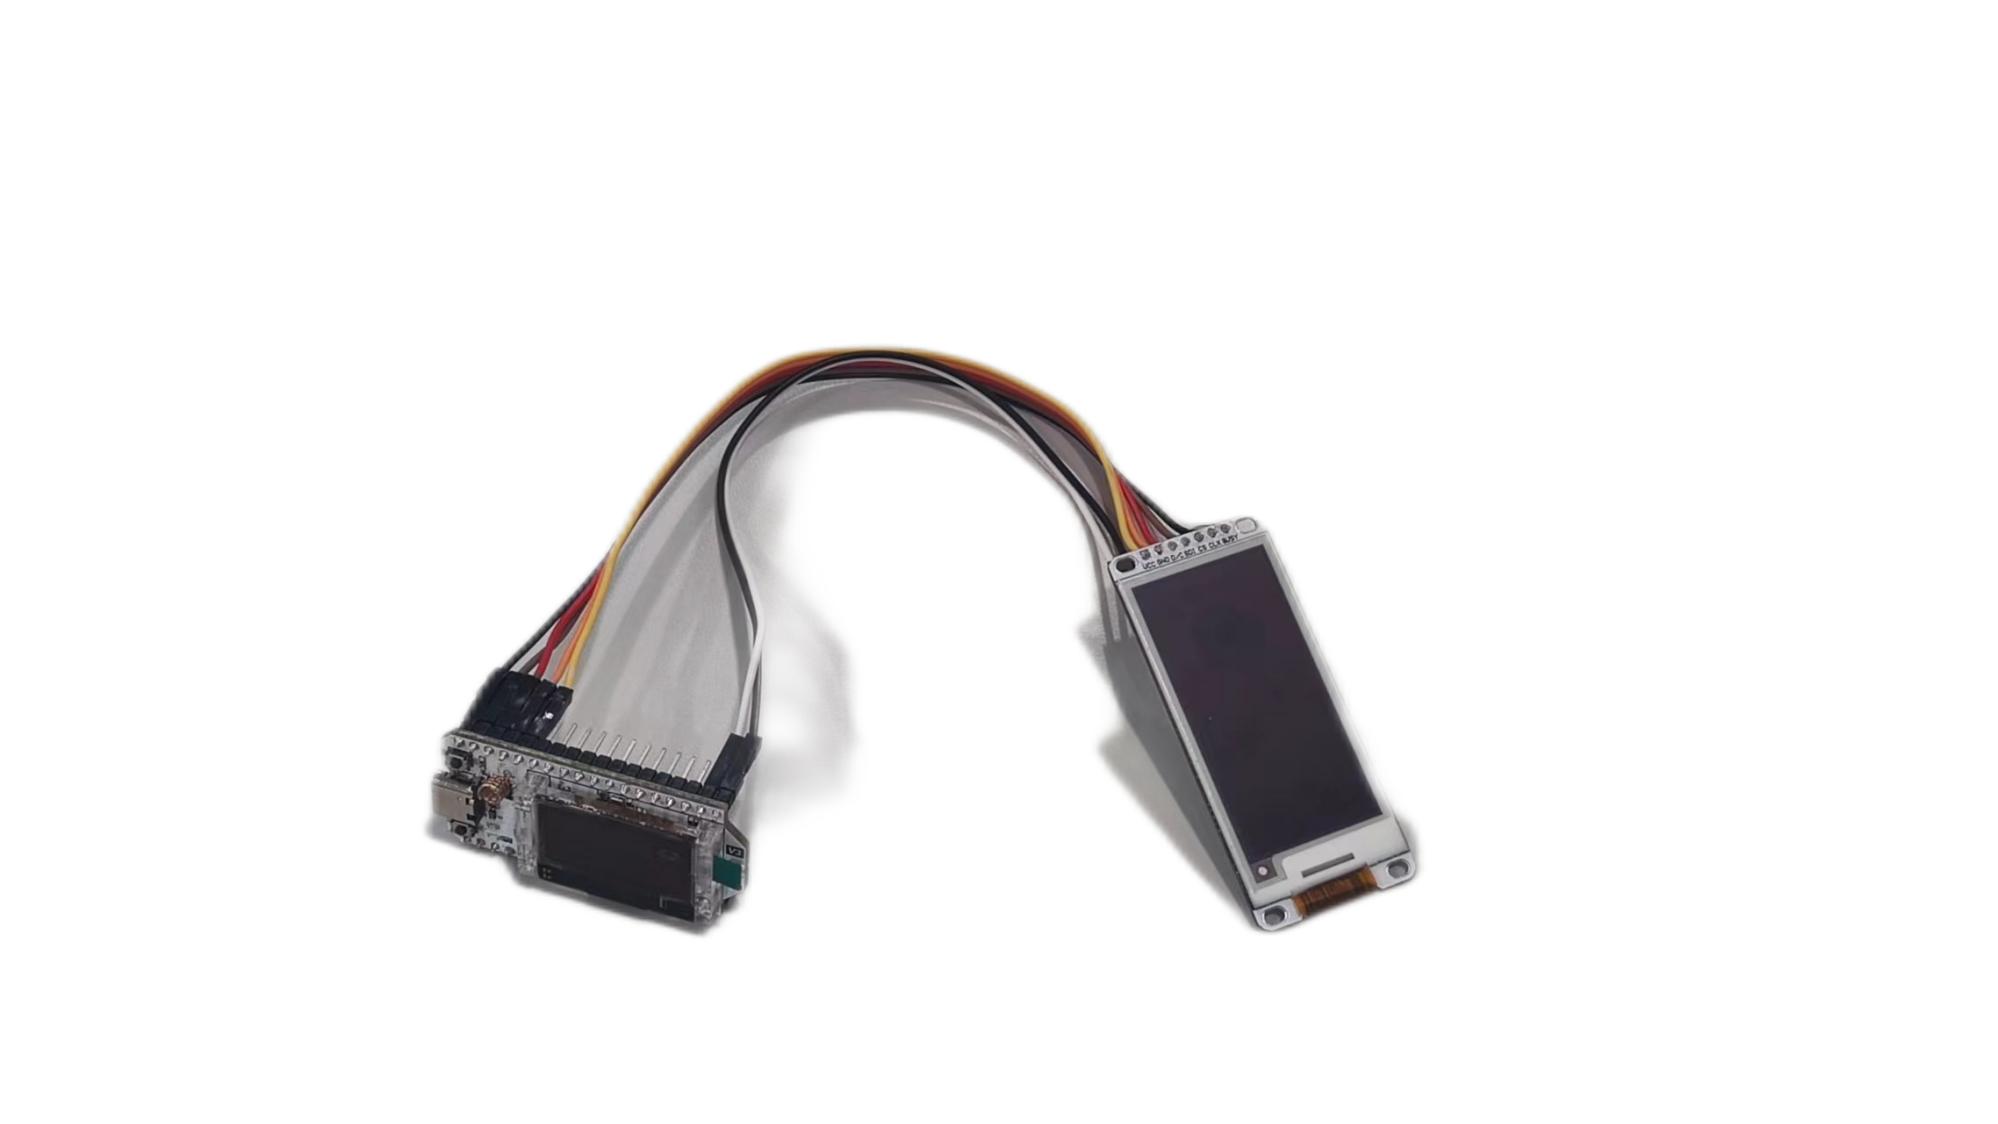
Connect the development board with driver board
Connect the BUSY, CLK, CS, SDI, D/C, GND, VCC pins on driver board to the GPIO7, GPIO6, GPIO5, GPIO4, GPIO3, GND, 3V3 pins of development board, respectively.
Downloading the code
Install development environment
Install our development environment, WiFi LoRa 32 was used in the example,go to:Esp32 Quick start.
Opening the example code
Connect
WiFi LoRa 32to the computer using a TYPE-C wire.Click ‘tool’ and select board and port.
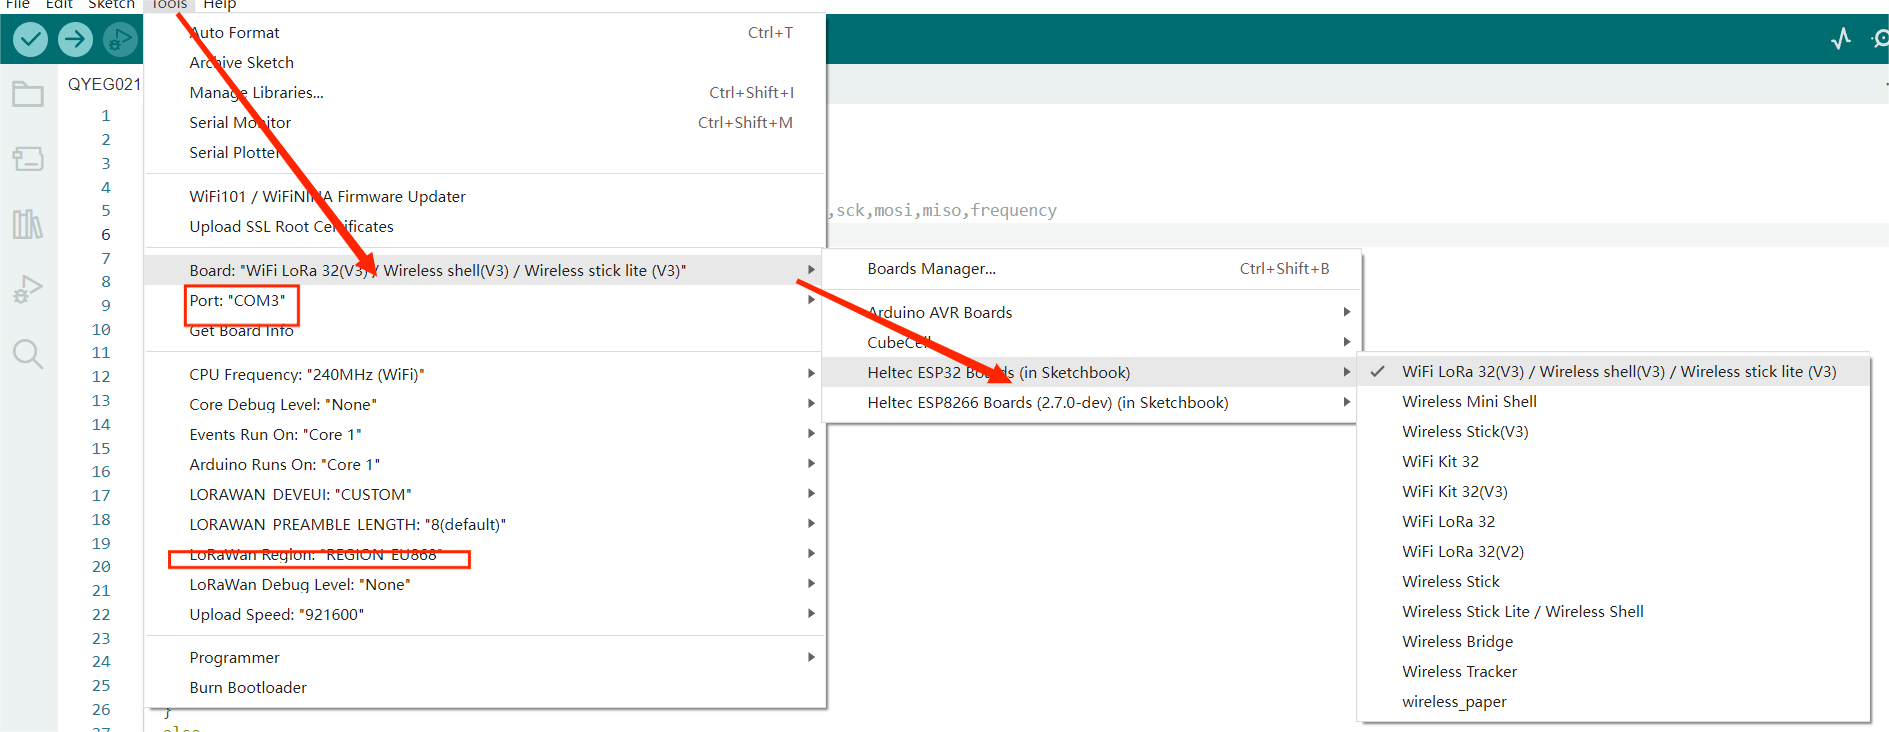
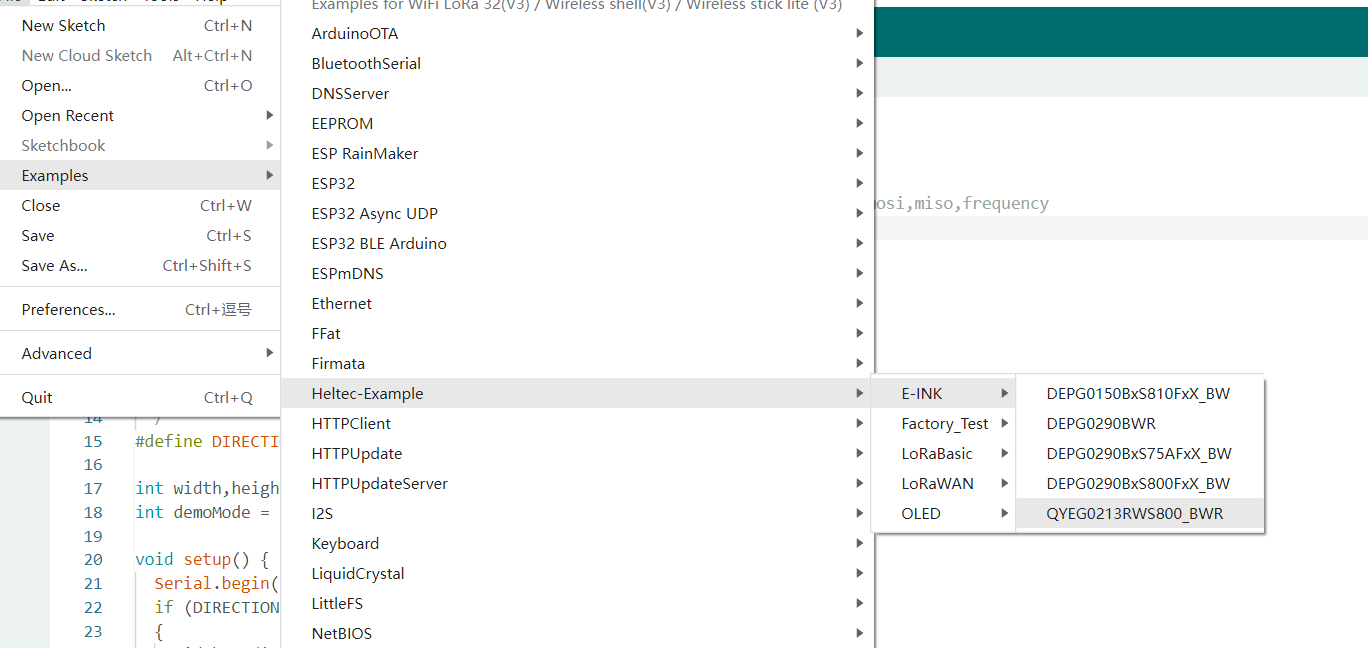
Open the example we provided as shown below.
Set the pin
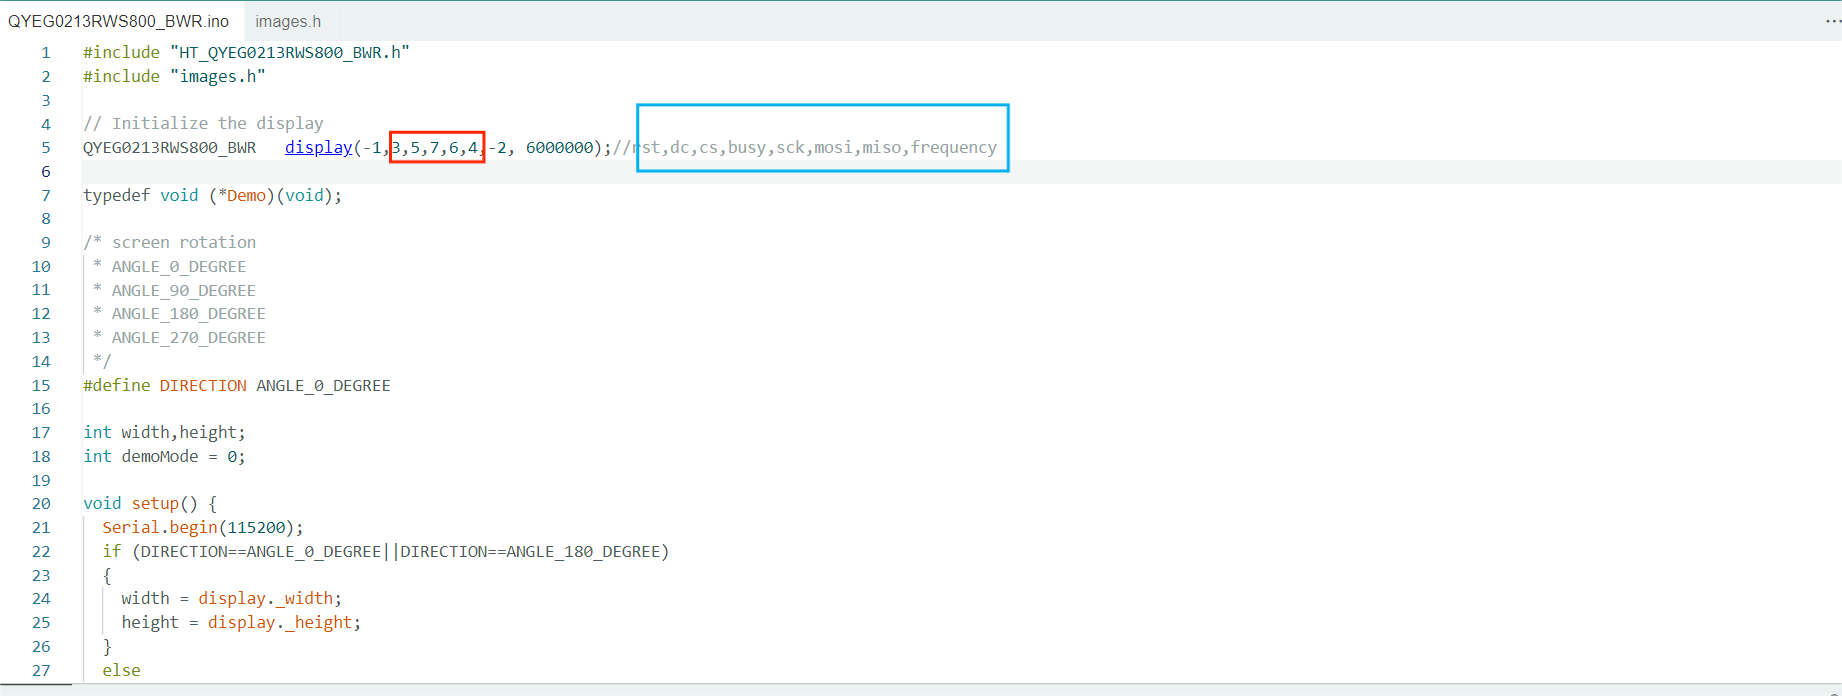
According to the prompts of the blue box, fill in the pins connected on the development board in the red box section. ‘rst’ and ‘MISO’ will not be used in this example, set these two pins to ‘-1’ and ‘-2’.
Fill in the red box: 3,5,7,6,4.
Tip
Do not write ‘3,5,7,6,4’ as GPIO3~GPIO4.
Setting image information
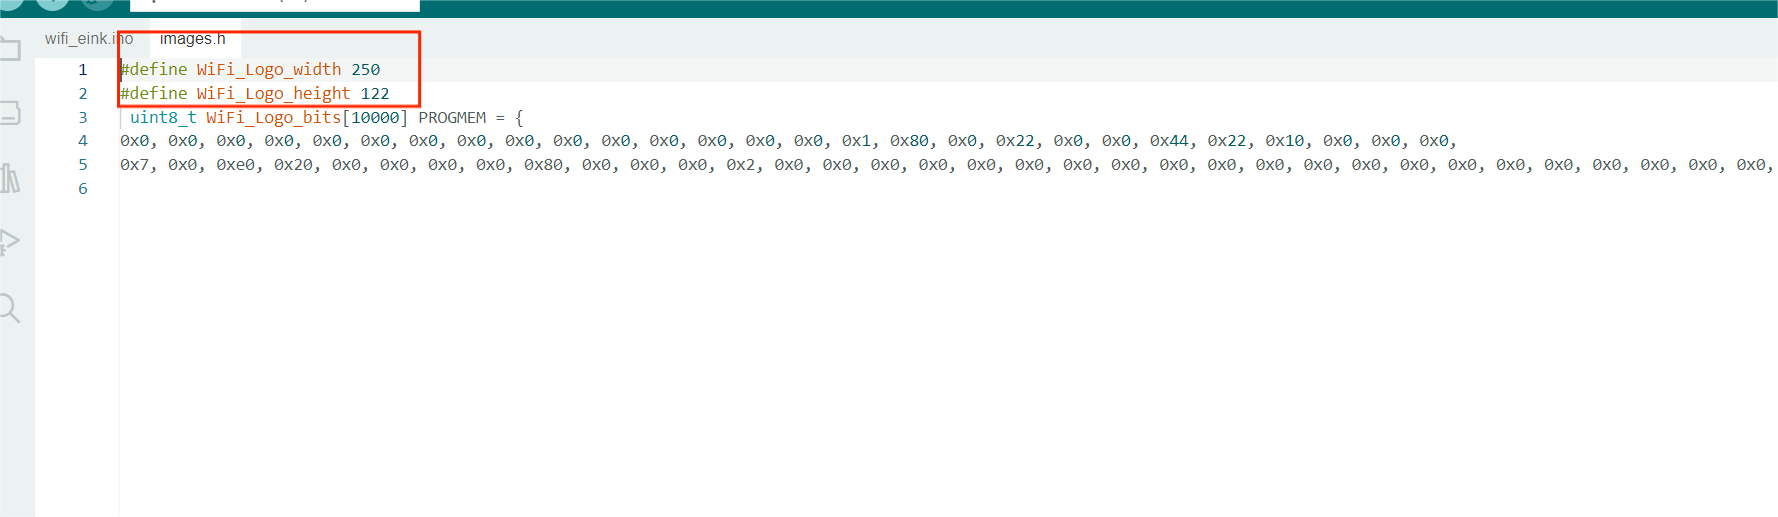
Replace the contents of image.h with the file Convertio generated earlier, as shown below.
Tip
Be careful to fill in the data of Weight and Hight in the red box part of the figure, rather than copying this part directly.
Click upload, when the program is uploaded, the image is displayed on E-Ink.